Monday, December 23, 2013

My First Gingerbread House from Scratch

Gingerbread houses have always had two speeds for me:  Those kit things you get from places like Target, or those impossibly detailed ones like Martha Stewart makes with sugar stained glass windows or by the really intense competitors at OSSAS.  I wasn't really up for attempting a Martha Stewart one, and every year I let my kids make one of the kits but I try to let them do that all on their own.

A week or two ago I was on Pinterest and came across a really beautiful gingerbread house that wasn't fussy, or overly complicated, or anything else.  It was just lovely.  And as I researched more and more, I realized that there is a person on Flickr that is incredibly creative and talented with this genre or sugar art.  I can't find much information on her, but she goes by the name Sassybeautimus and she is AHmazing.  Take a look at her work, she is so inspiring!  I decided to take from cues from her, and also my very rainbowy 2013, and make a rainbow hued gingerbread house.


I'm a pretty big fan of Smitten Kitchen, and happened to find a link to a yummy gingerbread recipe online.  It worked pretty well, BUT, I got some bubbles on the panels during baking that stuck around after they cooled, making the surface uneven.  This was a bummer, but a friend of mine told me the bubbles come from layers of butter and flour. She keeps an eye on hers during baking and pops them with a pin to diffuse the built up air.  Next time!  Here's the recipe I used:


6 cups all-purpose flour

1 teaspoon baking soda
1/2 teaspoon baking powder
4 teaspoons ground ginger
4 teaspoons ground cinnamon
1 1/2 teaspoons ground cloves
1 teaspoon finely ground pepper
1 1/2 teaspoons coarse salt
1 cup (2 sticks or 1/2 pound) unsalted butter (at room temperature)
1 cup packed dark-brown sugar
2 large eggs
1 cup unsulfured molasses

Bake at 350 for 12-14 minutes


Before baking, I cut out templates to the dimensions I wanted for the house.  I rolled out the dough, then traced the templates with a knife.  After baking, I chose to let the pieces to sit out overnight to get nice and stiff to be stable enough to construct the house.  If I was making this recipe primarily for eating, I would definitely store them in an airtight container to make sure they would stay the right chewy texture.  

The next morning I got to work.  The first thing I did was cover the board I was using in a thick royal icing to give the panels something to stick to.  The panels went together perfectly with just a little royal icing on the seams.  I waited a couple of hours to attach the roof to make sure everything was stable (the roof is pretty heavy with all those fondant hearts!), and set to work with decorating the house.


I used a little bit of candy, but didn't like what I found in the candy stores and used mostly royal icing and fondant decorations.  The roof is decorated with over 200 fondant hearts.  I added the cute little snowman and Christmas tree in the yard.  I also decorated the sides of the house with fondant peppermints and other lollipop type candies!  I also used royal icing on spots of the roof to look like snow.

This gingerbread house was a lot of fun to make, I might have to make it a Christmas tradition!

Friday, September 13, 2013

My Little Pony 8th Birthday


Rainbow cakes seem to be a little common around here lately!  This week, my beautiful daughter turned 8.  That's beyond hard to believe for me, because it seems like just so recently I was making her a Wall-E Cake.  Luckily, though, she is that delightful type of eight that still revels in princesses and ponies.  
My Little Pony has gotten a bit of a revamp since I was a kid and has surged in popularity recently.  Charlotte has been obsessively watching the episodes on Netflix, and begged and begged for a My Little Pony cake for her birthday.  Done.  It's like a (prettier) slice of my own childhood.  


The cake was actually easy peasy.  As has been my habit lately, I collected inspiration on Pinterest.  The top tier is from a design I saw there.  A purple fondant covered cake with rainbow hued flowers.  The flowers are fondant, I didn't even have to use gumpaste or Tylose, and I used my tiny violet cutter for them.  I made the centers also out of different colors.
The bottom tier I wanted something very frilly and girly, because that describes my daughter pretty well.  After covering it in fondant, I used a pasta roller to roll out very thin strips of gumpaste.  I believe I used the 6 setting.  Next I cut out the thinned gumpaste into ribbons, about 1/4 inch wide.  I dampened my fondant with some water, and then just zig zagged the ribbons onto the cake.  It made these pretty little ruffles!
I did try to juxtaposition them so that when I put on one ribbon in the direction left-right-left-right, I countered the next one with right-left-right-left just so that it wouldn't look too uniform and perfect.
After that, I took vodka and sprayed down the cake, and then applied hot pink glitter to the ruffles for lots of shimmer.  The glitter stuck on the ruffles like a charm.
The rainbow on the top of the cake is thin ropes of gumpaste that I attached with wooden skewers and placed on the top of the cake.  The clouds are gumpaste, too!
The tutu I used from Aislinn's birthday last month.  And the ponies-I know in the cake world that buying plastic toys and putting them on cakes is considered kind of...lazy since you aren't shaping gumpaste into some lovely edible art.  But ya know, nothing makes a kid happier than these little figures they can play with for a long, long time.  :)  But below is a pic of the cake sans figures.
And the inside of the cake?  Chocolate with hot pink vanilla frosting of course!
Charlotte loved her cake, and so did all of her friends that came to her party.  Happy birthday to the kindest girl I know!

Tuesday, August 27, 2013

Rainbow First Birthday!

This weekend is a pretty amazing one for us-our little baby's first birthday!  Aislinn has just been the cherry on the top of our sundae, and it has been beyond wonderful having a baby around now that the two other kids are a bit older and in school.

I saw this cake by Wild Orchid Baking Company awhile back, and the instant I saw it, knew it would be perfect for Aislinn's first birthday.

I tweaked the design a little bit because I wanted it to be a girly, almost dayglo rainbow full of bright pink and turquoise.  I think that's what I got!

This is another cake where it is important to measure and put the decorations on precisely.  After covering the cakes in fondant, I took my heart cutter and indented the shape directly onto the cake, going around the entire base, and keeping the spacing as symmetrical as possible.  Next, I took a graphite pencil and a ruler, and drew lines from the bottom point of each heart to the top of the cake to make sure the hearts would stay in alignment and not get crooked on me.


I cut out the colors for the bottom row, placed them on, and then continued on to the second row and so forth.  It actually didn't take long at all!

For the number I used a fondant/tylose mix and decorated it with purple disco dust.  Remember, disco dust is no longer considered an edible decoration so only use it on parts of your cake that will not be consumed.

For the final touch I decided to put hearts on wires.  I twisted them around my finger to make spirals and then threaded the hearts right on.  Pretty cute!

For the tutu, I went to a local craft store that sells fabric and bought a yard of each color of tulle.  Then I cut squares of the tulle, about 3X3 inches, then gathered the top and pinned it with straight pins.  I loved how it turned out and felt like it really added a lot to the cake.


I really loved A's little smash cake.  I just did a rough job frosting it.  I cut out little hearts and then attached them with string that I hung between two paper straws.  It was a perfect smash cake.  

All in all, our little baby had a great first birthday.  She ate cake, but mostly enjoyed squeezing it between her fingers.  Happy birthday, Aislinn!


Saturday, April 13, 2013

Icing Smiles Cake for Davein

Icing Smiles is a wonderful organization that provides cakes for seriously ill children and their families.  I started following them last year on Facebook, and signed up to volunteer as a cake maker in Boulder.  About a month ago I finally got a Call to Action from them.  I cannot tell you how happy I was to make a cake for this little boy and to be part of such an amazing charity!

I made this cake for Davein, who is battling Acute Lymphoblastic Leukemia. Davein is turning six years old this year, and requested a Jake and the Neverland Pirates cake.  My kids are a little too old for this show, so I didn't have a lot of knowledge on it.  A trip to the Disney Store and several Google searches helped enlighten me.  And thanks to Pinterest I was able to collect most of my inspiration for it in one place, on my Icing Smiles Inspiration Board.  (Pinterest is my new favorite brainstorming tool, by the way.)

The first thing I made was the pirate ship.  It is made from gumpaste, which I painted brown with food coloring and vodka.  After scoring the sides of the ship with a sharp knife to make the wood planks, I stippled the color directly onto the gumpaste with a paper towel dipped in the vodka food coloring mixture.  The sails of the ship were made from Wilton icing sheets.  I had never used these before and they were perfect for what I wanted.  They ARE difficult to cut and a little brittle (so they break easily) but I love how clean the stripes are and how they turned out.  The pirate flag was regular gumpaste that I hand painted with black food coloring, and also stippled the edges with brown color to make it look weathered.  The cannon and little porthole windows are painted gold.  I won some neat prizes from Sweet Times in the Rockies, and one of the things I got was a spray gold food coloring.  It worked like a dream-no drips or streaks.  It wasn't as metallic as painting with gold pigment, but I was super happy with how fast and easy it was.  For the waves, I used a couple of different colors of blue gumpaste and rolled it into little curlicues, which I placed around the base of the ship.  Those little curls might be my favorite part of the whole cake.

The middle tier was fun, because I decided to hand paint it with a very fine tipped brush.  I painted a star on it for a compass.  I did not dilute the food coloring on this tier with vodka-just painted straight from the bottle.

The top tier and then also the banner with the inscription at the base of the cake are gumpaste that I wanted to look like weathered canvas.  I cut it roughly, with some cutouts in the middle.  And then again with brown food coloring and vodka, brushed it around the edges to give it the look I wanted.

And now the figurines...ah yes.  Those.  I kinda struggled here, because I don't like using plastic figures on my cake (even though I have for Nate and Charlotte because they love those figure sets from the Disney Store).  It isn't really art, right?  And it is more artistic to make them myself, right?  But Nate and Char INSISTED, over and over again, that the toys would be better because then Davein could play with them later-and what would he do with fondant ones?  I finally succumbed to their reasoning.

On to the cake board.  I covered it first in blue marbled fondant for the sea, and the "glued" crushed grahm crackers to it for sand (I used light corn syrup).  Then I tossed some little gold coins into the sand for prosperity.  

This morning Davein picked up his cake and he loved it!  Happy 6th Birthday Davein!


Wednesday, March 13, 2013

Blue and Gold Blizzard

Since my son started Cub Scouts a couple of years ago, I have been lucky enough to get to make the cake every year for the Blue and Gold Banquet.  I'm usually given free reign on the design as long as I work within the realm of Scouting.
2012 Blue and Gold Banquet Cake
2011 Blue and Gold Banquet Cake

This year I really wanted to do a cupcake tower instead of my usual tiered cake.  I have always wanted to do one of these because I never have really had an opportunity before and I've often been inspired by bakeries like Pink Cake Box that do lovely ones.

The banquet was scheduled for two weeks ago and I spent a couple of days baking and decorating ten dozen cupcakes.  I made Oreo, Vanilla, and Red Velvet flavors.  They were perfect.  I also made a 6 inch cake for the top and decorated it with some little fondant figures on a bridge.  And then the day of the event...there was a blizzard here in Boulder.  A full-on-road-closing-shut-everything-down blizzard.  The event was cancelled.  I was stuck with 120 uneaten cupcakes.  Ugh.  Luckily between friends, neighbors, and coworkers we were able to give them all away.  But it still meant that I would have to remake all of them when the event was rescheduled.

As luck would strangely have it, there was another severe snowstorm this weekend as well!  That's life in Boulder for you!  Thank goodness this snowstorm wasn't severe enough to cancel the event again.

After last time, I took a slightly easier way out and just made two flavors or cake-Oreo Cake with Vanilla Frosting, and Vanilla Cake with Vanilla Frosting.  The Oreo cake is basically my regular chocolate recipe, but with a cookie in the bottom of the cupcake.  It tastes pretty awesome and was pretty popular among the boys.

The theme this year for the "Twelve points of Scout Law" and I wasn't sure how to make that interesting.  Awhile back, when I lived in Texas, I did a cake with that as a theme and had piped each value on the tiers of the cake.  That tends to be more of an Eagle Court of Honor thing, and not something all that fun for little boys in Cub Scouts.  So I decided to use the Crossover Ceremony as inspiration instead.
Eagle Court of Honor Cake, circa 2008

The Crossover Ceremony happens at the end of the school year and the boys walk over a bridge to symbolize becoming the next rank of Scout.  So I made a tiny bridge out of brown gumpaste. I scored the pieces of fondant to look more like wood and then attached them to the cake with wooden skewers.

When the bridge was complete, I made each individual rank of Cub Scout: Tiger, Wolf, Bear, and Webelo.  I tried to make their heights correspond to their ages and ranks, with the little Tiger Cubs in the front.  I also attached them to the cake with skewers through the legs.

Once I had the boys on I felt like something was still missing from the cake, so I added the apple tree with a little blue bird in a nest.  The leaves of the tree are just small balls of gumpaste in different shades of green, with the red apples randomly dispersed.  I like how the tree turned out (although it does look like it is covered in M&Ms) because it added some color and whimsy to the cake.

I hope the boys enjoyed the cake and cupcakes, and good luck to everyone in the next year!


Sunday, February 10, 2013

New Mexico Wedding Cake

It's time for Sweet Times in the Rockies 2013!  Last year I did not enter because I had another event and was unable to do that and a competition cake.  So I was very happy to have things work out this year so I could enter again!

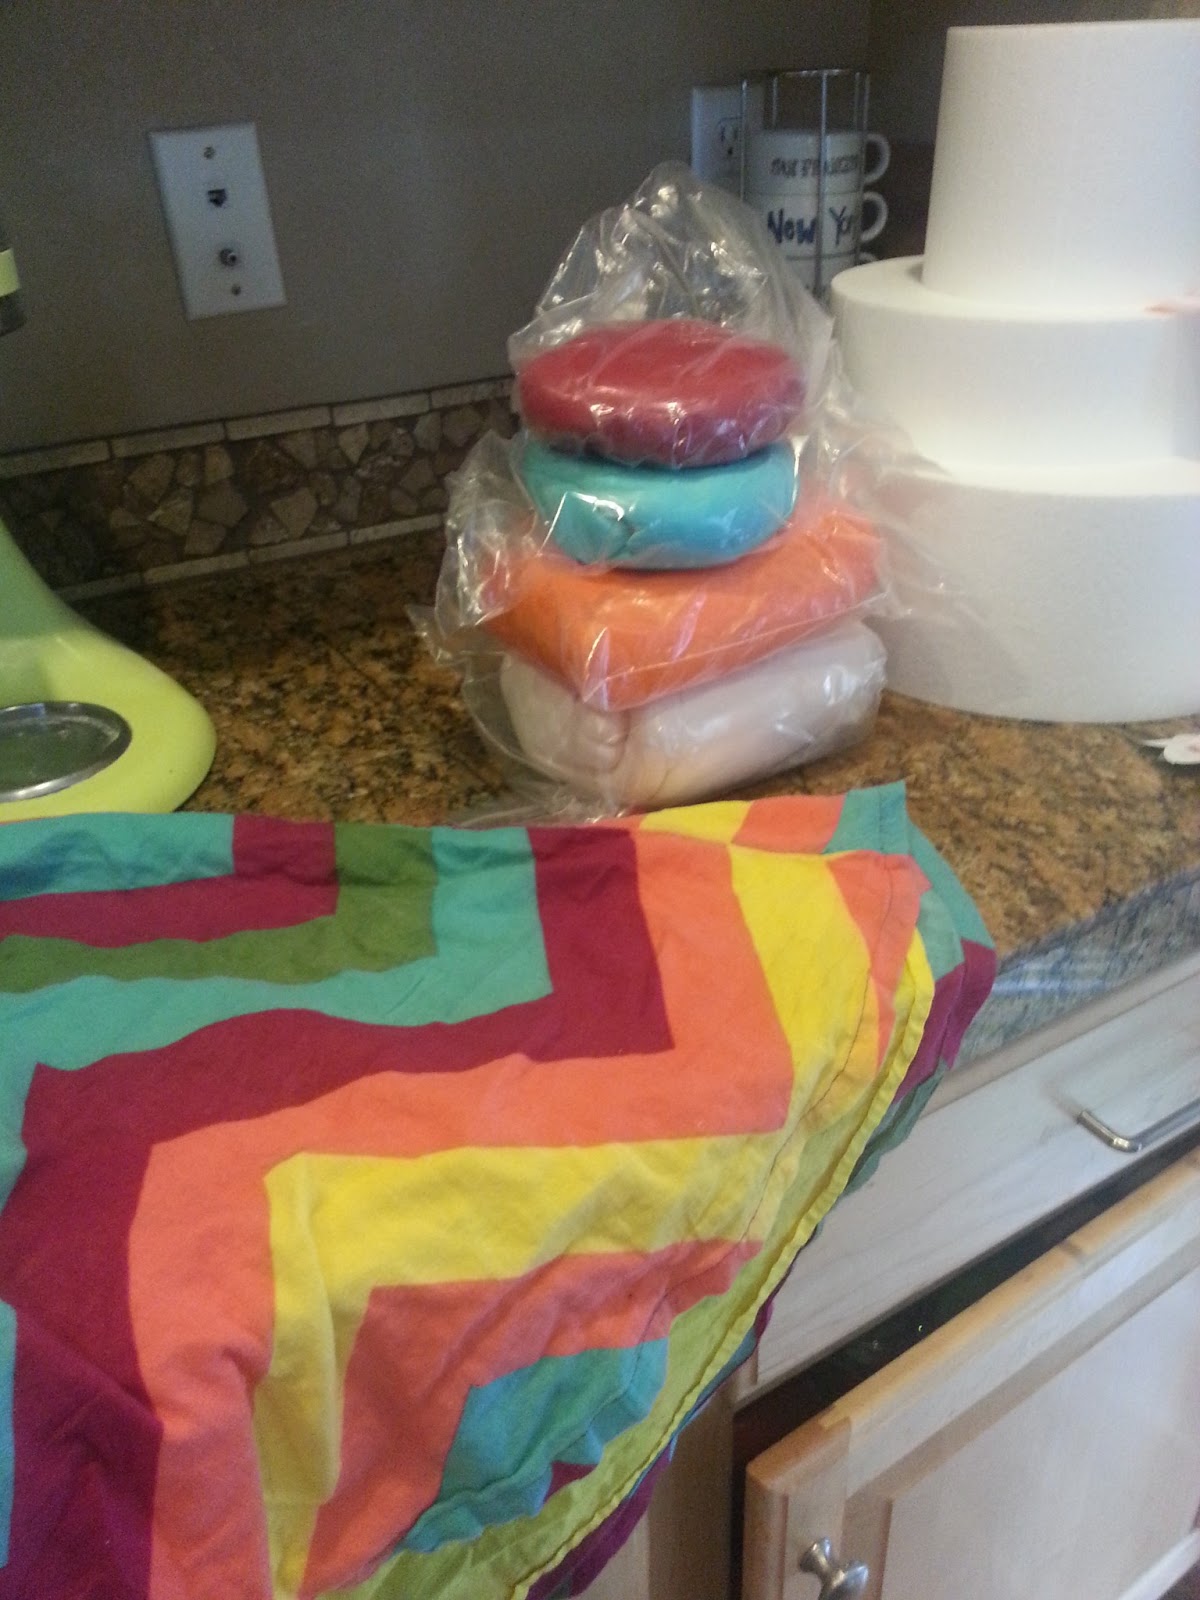
People who know me know that I get a lot of inspiration from my daughter Charlotte's dresses, because she's an awesome little fashionista with way better taste in clothes than I have.  This cake came straight from her First Day of First Grade Dress.

The dress is basically a pattern of very deep, bright chevrons.  It always reminded me of New Mexico colors because of the turquoise and orange.  When planning for this competition, I didn't know what I was going to make until I was getting Charlotte dressed one morning and the dress pretty much jumped out at me from her closet.  A chevron cake, with the coolest of all desert plants-succulents.

I did a ton of research and drew a lot of sketches to try to hit the right tone.  I compiled most of my inspiration here, which was a huge help to have something to continually flip back to.  http://pinterest.com/summerrippe/stitr-inspiration/

As for my sketches, I was pretty lucky to have a group of friends that I could ask questions and advice from, and had them vote on which sketch they liked best.  Huh-looking at those four pictures now I realize I went with none of them.

While I knew the basic pattern and colors, I didn't know what to do about the middle tier.  I kept thinking of trying to make some rustic lace with Sugar Veil, but it just didn't seem to coordinate with my design.  One night I finally just Googled "New Mexico Jewelry" and came across lots of leather bands with turquoise sewn onto them.  It was the perfect addition.

Then the work began.  And let me tell you:  Chevrons. Are. Hard.  And maybe it's just because I am out of practice (can I blame that on the pregnancy, too?  Like being unable to run three miles anymore?). But seriously, hard.  I decided to individually piece them onto the cake, which I really liked in the end because it made the cake look more like hand made pottery.

One thing I will note here is that if you chose to do a chevron cake, you should carefully check your math before embarking on decorating the cake.  I actually did not do this in the beginning and the chevrons did not meet up in the back.  So I had to recover that tier and start again, basically losing a couple of hours worth of work.  The math is pretty simple-just take the circumfrence of the tier, divide it by the number of chevrons you will want, and then you get the length your chevron should be.

The leather band around the middle tier was fun, but I had to get creative with the texture.  I have some impression mats, but none of them were right to make the fondant look like tooled leather.  So?  I used the covering from our florescent light (washed first, of course).  The texture was pretty spot on.  Next, I took some vodka mixed with brown food coloring and stippled the surface.  This part is important, because at first I painted it with regular strokes and it came out dark and heavy handed.  This resulted in me needing to take off all the fondant, recover the tier and start back at the beginning (more labor lost, le sigh).  Stippling got the color on in just the right amount and I think helped with the worn leather look.

The turquoise gemstones were really fun!  These were made from gumpaste.  I hand molded them into the shape I wanted and let them dry.  Next I painted them with two coats of Confectioner's Glaze (check online cake suppliers), drying between the coats, and then let them dry overnight.  When I got up the next morning, the gumpaste had cracked a little bit.  This turned out to be in my advantage because it gave me a natural pattern to vein the turquoise.  Taking a very fine tipped brush, I painted the veins with black food coloring and vodka.  Following the cracks both masked the imperfection but also made the turquoise look more natural.  I made the coral stones pretty much the same way, but did not vein them.

Succulents are one of my all time favorite plants and I was excited to get to make some.
I ended up following this tutorial for the succulents that went on the cake but tweaked it a little.  http://www.pixel-whisk.com/2012/04/succulent-cupcakes.html  Since I did not have the cutter she used, I had to draw out my own templates and then use an exacto-knife.  Also, I used different colored petal dusts than she used-I chose Chartreuse, Moss Green, and White.  These turned out well and I was able to just place them on the cake with some edible glue.

Which brings me to the edible glue, something else I had not used before.  It's pretty cool actually and made from Tylose and water.  Take 1/4 tsp of Tylose, mix it with 2 Tbsp of hot water.  It will be clumpy, and that's fine.  Cover, put in the fridge over night.  When you get up you will have a clear, sticky gel to work with that won't show up like royal icing will.  It seemed to work just fine.

One of my most favorite parts of the cake is the base.  In my Pinterest inspiration board, there is a cake on a wooden board that I just loooooved.  I looked at a lot of stores for something similar.  I even went to a wood working shop and scoured the internet for cheese boards.  Nothing was right.  One afternoon I serendipitously ended up at Williams and Sonoma, and this was on a display table at the very front of the store.  I measured it-the cake would actually fit!  Being from Williams and Sonoma it was over priced, and I thought and thought about it for a couple of weeks before finally buying it.  By then it was on sale.  I have to say, it's pretty perfect.

And, it ended up winning First Place in the Professional Tiered Cake Category.  Lots of work, but totally worth it.


Wednesday, January 23, 2013

So It's Been Like Two Years

And what have I been up to?   Well the answer is A LOT and very little of it was cake related.  First:  When we moved to Colorado all the way back in 2009,  I was pretty overwhelmed with the beauty of where we lived.  Colorado is a wild place and for the first couple of years all of my time was spent exploring it, hiking open space trails, going up into the high mountains, and soaking up every bit of natural beauty that I could.

And then after that?  Well, I was up to this:


Meet Aislinn Rose!  She's pretty much the awesomest blue eyed baby you would ever get to meet.  She was born six months ago and takes up just about every moment of my time.  Being my third baby, I know how quickly time goes and pretty much just want to hold her every second I can while she is little.  And she's already starting to get squirmy with wanting to chase around her big brother and sister.
 
So anyway, while I was pregnant with her I had a lot of free time on my hands due to the fact that Charlotte was finally in school full time.  I was hoping to make a few cakes here and there but as luck would have it, the smell of fondant didn't agree with me so much.  So cakes were on hold once again.

Now it is late January 2013, which means Sweet Time In The Rockies is coming up!  This is a local cake show in Denver that I entered before and am entering again on February 9th.  And then after that, I have another cake coming up for a Cub Scout Blue and Gold Banquet.

With home baking now being legal in Colorado, I am hoping to make about a cake per month to slowly   get my feet wet again in the cake world.  So stay tuned!

But until then, here are some of the cakes that I have made the past couple of years, but didn't put on the blog.  Enjoy!

Charlotte's Sixth Birthday Cake-Rapunzel!
      

Nate's 8th Birthday Cake - Ben 10
      

Boy Scout Blue and Gold Banquet Cake 2011


Charlotte's 7th Birthday Cake - Merida/Brave


Nate's 9th Birthday Cake - Pokemon Pokeball

Cub Scouts Blue and Gold Banquet Cake 2012

Also, if anyone is interested, here are my Facebook and Pinterest Pages (gotta stay plugged in, apparently):

https://www.facebook.com/pages/Butterfly-Sweets-Cakery/112875872087012
http://pinterest.com/buterflysweets/


© Butterfly Sweets. Powered by